
Today I'm starting a new series on the blog I'm calling 'Make it Monday!' Every Monday I'll be providing details about a new technique I've discovered during the previous week. Hopefully we'll learn alot about paper crafting together!
This week, I wanted to create some cards with unique backgrounds,
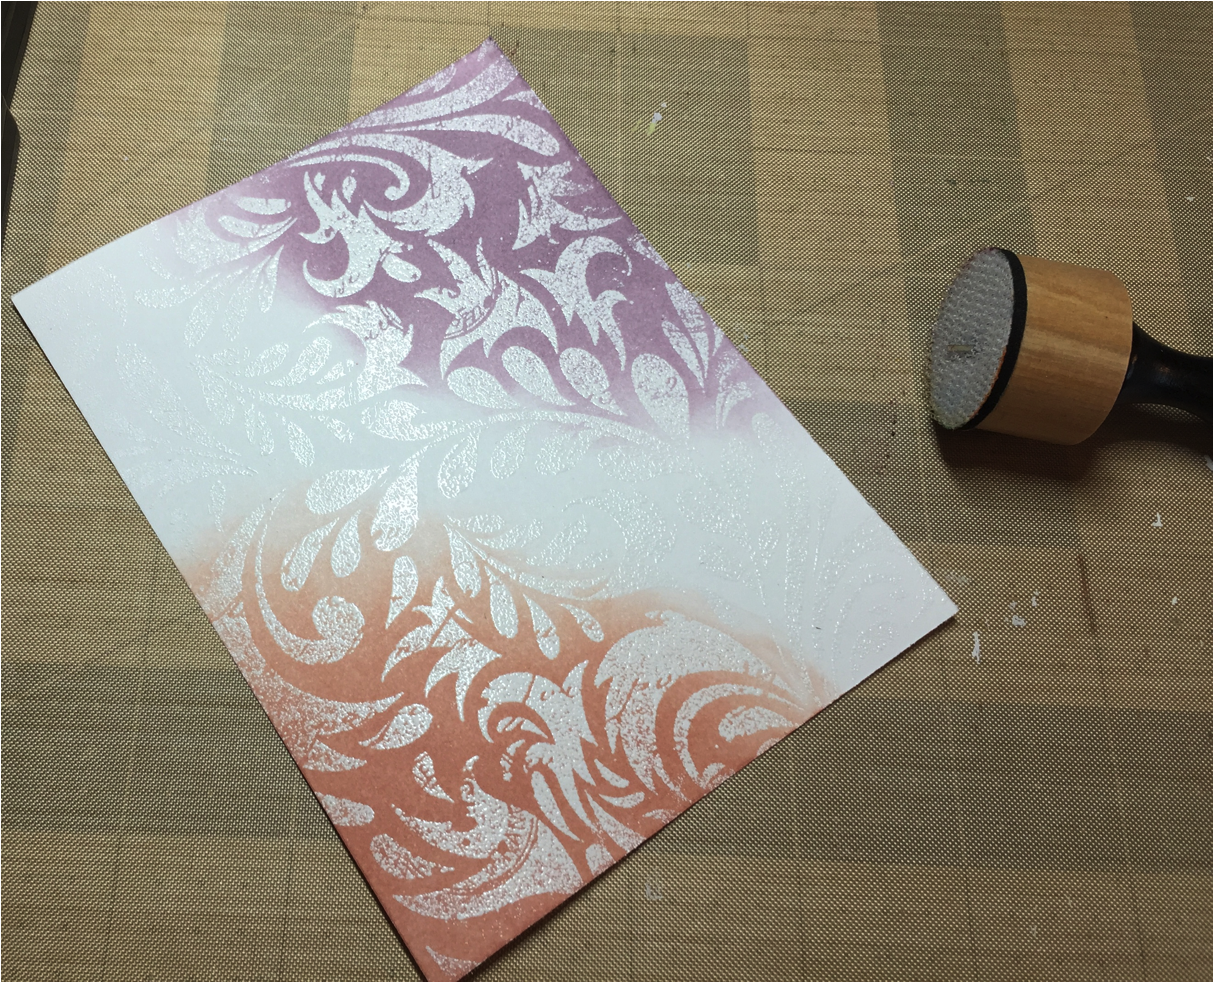
so I thought I’d give the emboss-resist technique a try. All you need for this method is a stamp, some
embossing ink and powder, and an inkpad or two. The general process is to ink
the stamp with embossing ink, stamp your paper, sprinkle with embossing powder
and heat set, then blend ink onto the embossed paper. A quick wipe with a clean towel removes any
ink residue from areas where the paper is embossed, revealing a beautiful
stamped pattern.
Since Tim Holtz watercolor distress inks are
so easy to blend (and I’ve got almost every color), I decided to use those, but
any brand of ink will do. The easiest
kind of stamp to use for this technique is a large background stamp because you
only have to ink it up and stamp it once.
But you can also use smaller stamps just by repeating the ink-then-stamp
process. I chose a background stamp
slightly larger than the 5 ¼” x 4” layer so I’d only have to do it once.
I created four different cards with this
technique; each with its own color scheme, pattern and sentiment. Below you’ll find a detailed description for
how to make one of the cards.


Materials:
Not all materials for this card are from
Stampin' Up! If they are, you'll see SU beside it and you'll find links
below the instructions to purchase them. If they're not from Stampin'
Up!, I've mentioned the manufacturer here; stores like Michaels, Hobby Lobby,
Joann's, or Walmart or online at Amazon, Scrapbook.com, Maymaymadeit.com, etc.
carry these items.
Card Base (SU): Whisper White (heavy) – 8 ½”
x 5 1/2”
First Layer (SU): Whisper White – 5 ¼” x 4”
Sentiment Top Layer (SU): Whisper White – 3”x
3”
Sentiment Bottom Layer: Bazzill Basics
Grasscloth Texture – Bouquet – 2 ½” x 2 ½”
Inside Layer (SU): Whisper White – 5 ¼” x 4”
Ink (SU): VersaMark Embossing Ink (any watermark ink will do)
Distress Ink:
Shaded Lilac, Spun Sugar, Tattered Rose and Milled Lavender
Background Stamp: Leaf & Floral
Background Clings Rubber Stamp by Hero Arts
Sentiment Stamp: Sorry Stamp Set by Maymay Made It
Inside Layer Stamp (SU): Delicate Details
Thinlet Die (SU): Stitched Shapes
Embossing Powders: Wow Super Fine White &
Fairy Dust
Emboss It Pen: Black (Ranger)
Ribbon:
Celebrate It Tempo Ribbon – Purple (Michaels)
Other Supplies (SU): Snail adhesive, Tear and
Tape adhesive, Embossing Buddy, and Stampin’Up Dimensionals
Instructions:
1. Create the card base by scoring the Whisper
White cardstock at 5 ½” (A2 size top-folding card). Set aside for now.
2. Now let’s work on the background layer…Using
your watermark ink pad, ink up the background stamp. TIP: Since it’s so large, the easiest way is
the lay the stamp down with the ‘stamp surface’ up and pat it with the ink
pad. Typically you’d do it the other way
around! Using your embossing buddy, wipe the entire
surface of the cardstock layer you’re using for the background. Then lay it on
top of the inked stamp and press down to transfer the ink evenly. TIP:
If you lay a piece of scrap paper over the cardstock once it’s on the
stamp, you can run your palm over the entire surface, ensuring even coverage
without getting your hands all inky!


3. Next, lay the inked cardstock on a piece of
scrap paper and sprinkle embossing powder over the entire surface. Shake the excess onto the scrap paper; then
you can pour the leftover back into the jar!
Heat set the embossing powder with your heat tool.
4. Choose the inks you’ll be using for the
background; I selected four different shades of pink/purple. You can use a dabber or blending foam to
apply the ink. Starting with the first
color, swirl the ink onto the cardstock until you cover the desired area. Switch colors (and dabbers) and ink up the
next area. Repeat until you’ve covered
the entire layer with your desired colors.


5. Cut a piece of the ribbon long enough to lay vertically
along the background layer with just enough extra to tuck it around the
underside of the layer (approx. 6”).
Attach it to the back with tear and tape adhesive; then attach that to
the card base using snail adhesive.

6. Create the sentiment for the front using the
‘SORRY’ and ‘for your loss’ stamps from the Maymay Made It Sorry stamp
set. I used Seedless Preserves distress ink for the
sentiment. As an extra step that’s
certainly not required, because I wanted the ‘SORRY’ to stand out more, I
traced over the word ‘SORRY’ with an ‘Emboss It’ Pen by Ranger. Then I covered it with Fairy Dust embossing
powder and heat set it.

7. Use the 2 ½” square die from the Stampin’ Up Stitched Shapes set to cut out the final size for the sentiment. Be sure to run it through the Big Shot several times and use a shim if it’s not cutting all the way through. TIP: Use a piece of washi tape to hold the die in place while cutting!

8. Adhere the sentiment to the Bouquet Bazzill
cardstock; then using Stampin Up dimensionals, adhere the sentiment to the
middle of the card base over the ribbon.
9. To finish off the front of the card, create a
simple bow from the purple ribbon and adhere it to the top of the sentiment
with a glue dot. Trim the edges at an
angle for a clean look.

10. On the inside, using the same ink you used for the sentiment
(in my case, the Seedless Preserves distress ink), stamp the border stamp along
the top and bottom of the inside of the card.


Stampin' Up! Product List


No comments:
Post a Comment